
This article is going to show you how to use our Delivery Fees for WooCommerce plugin to set delivery prices based on your admin settings.
Delivery Fees for WooCommerce (DFWC for short) adds a custom shipping method to WooCommerce that is used as the delivery fee your customer pays during checkout.
WooCommerce Shipping Methods
Anyone who’s spent more than a few minutes working with WooCommerce will notice the plugin was built with a focus on shipping physical products to your customers.
That doesn’t help your delivery business much, now does it?
Picture it: your customers ask for delivery, but during checkout they’re stuck seeing a “Shipping” cost, and you’re stuck wishing there a was a better way.

With the Delivery Fees for WooCommerce plugin, there IS a better way!
Delivery Fees for WooCommerce
The DFWC plugin will change your WooCommerce shop’s “Shipping” references to “Delivery” and also let you customize the fees based on he available admin settings.
Let’s jump in and start installing the Delivery Fees for WooCommerce plugin so you can start checking out how it actually works.

Installing the plugin
The easiest way to install the DFWC plugin is to search for it in your admin dashboard.
Go to Plugins -> Add New and then search for Delivery Fees for WooCommerce.

After you click the Install button, the button color will turn blue and ask you to Activate the plugin.
Alternatively, you can download the plugin (link) and upload it through the same area of your dashboard.
Congratulations, you have installed and activated the DFWC plugin!
Now we can check out how the plugin actually works.
Adding Delivery Fees “Shipping Method”
There’s that word again; shipping.
First, before we even get to the shipping method, we’ll need to head over to the WooCommerce Shipping Zones settings.
You can find this page by going to WooCommerce -> Settings -> Shipping.
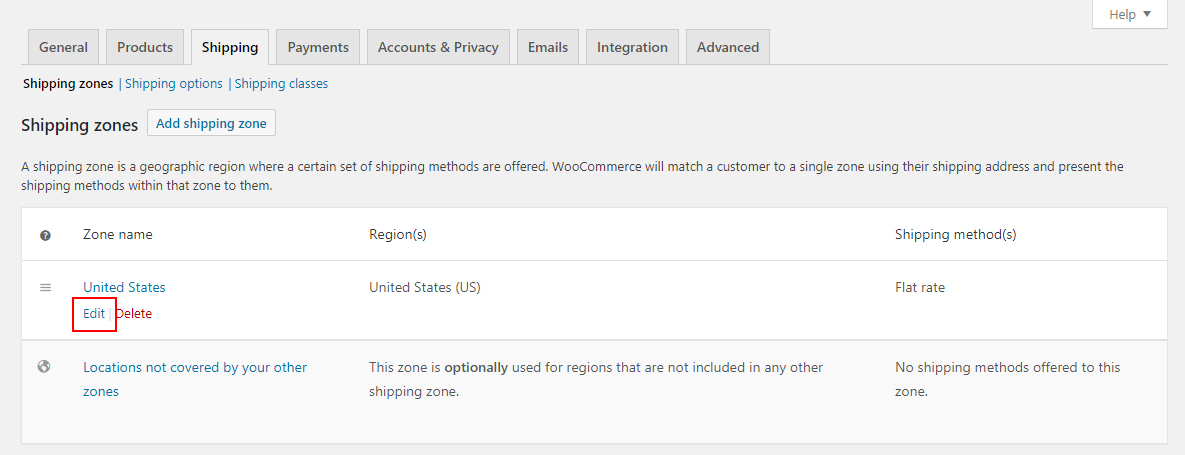
Click the Edit link on the zone of your choice – for instance, on the website in the screenshot above there’s a shipping zone set up for the entire United States.
You can find out more information about Shipping Zones in the official WooCommerce docs (link).
Once you’ve opened up the shipping zone, you’ll see the shipping methods section at the bottom of the page.

Next you’ll see a pop up with the option to select the shipping method of your choice.
Delivery Fees for WooCommerce adds a “Delivery fee” method, which you can see in the screenshot below.
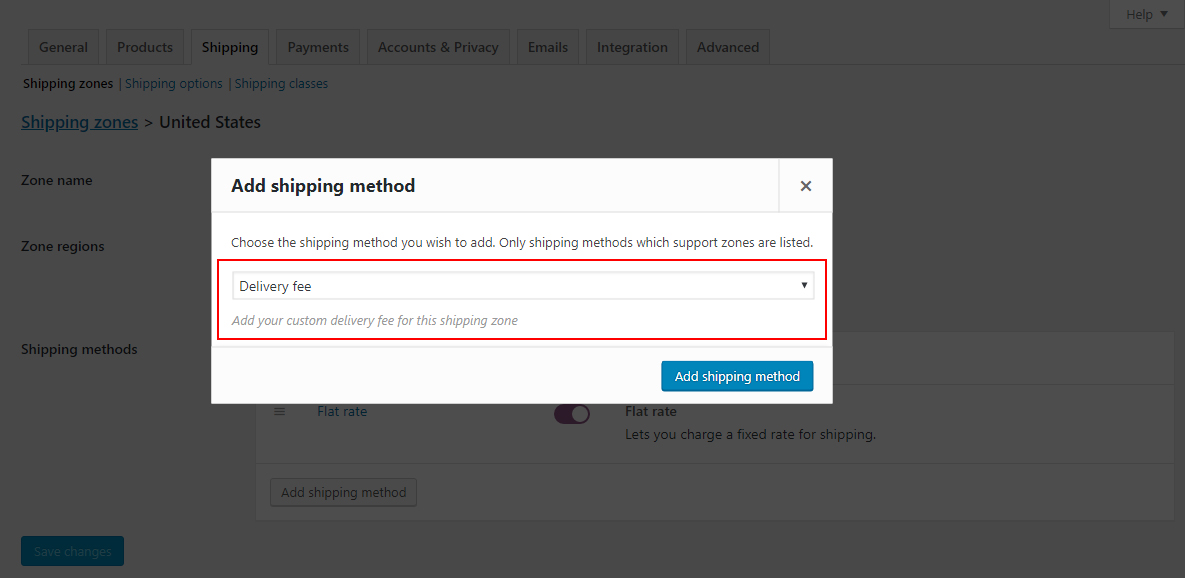
Let’s edit the Delivery fees shipping method and add the settings we want.
DFWC Delivery Fees Settings
The free version of the Delivery Fees for WooCommerce plugin comes with a couple of available settings.

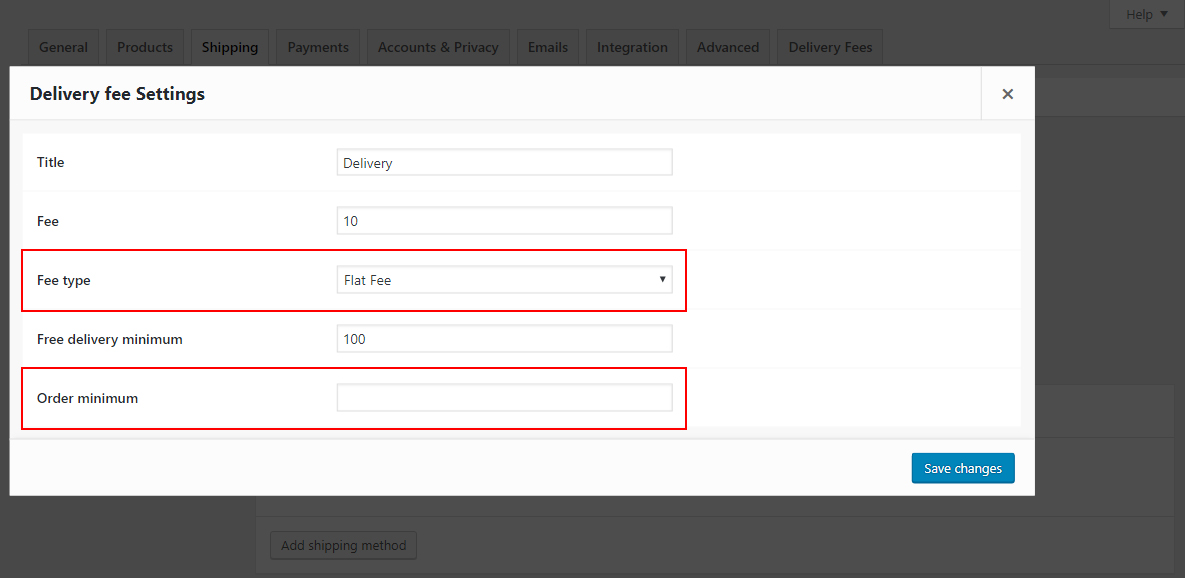
First, there’s the shipping method title, which lets you change the text displayed on the front end for the user during checkout.
Next is the fee amount. If you want to charge $10 for delivery, simply add “10” to the input field.
And finally, there’s the free delivery minimum setting where you can choose the amount you’d like to require as a minimum to offer free delivery (if any).
In our Pro version of the DFWC plugin (see below) we’ve added multiple fee types for you to choose from.
Once you’ve added the settings above, you’ll be able to see the new changes reflected in the checkout of your WooCommerce shop.

But what if you want more control over your delivery fees?
That’s where the Delivery Fees for WooCommerce Pro plugin comes in!
Delivery Fees for WooCommerce Pro
We’ve released our Delivery Fees WooCommerce Pro plugin to help extend the core functionality of the DFWC plugin.
Installing the plugin is a fairly easy process.
First, you’ll need to download the zip file you received after your purchase.
Note: You can find this file any time by going to the Orders tab of the My Account page and find your order.
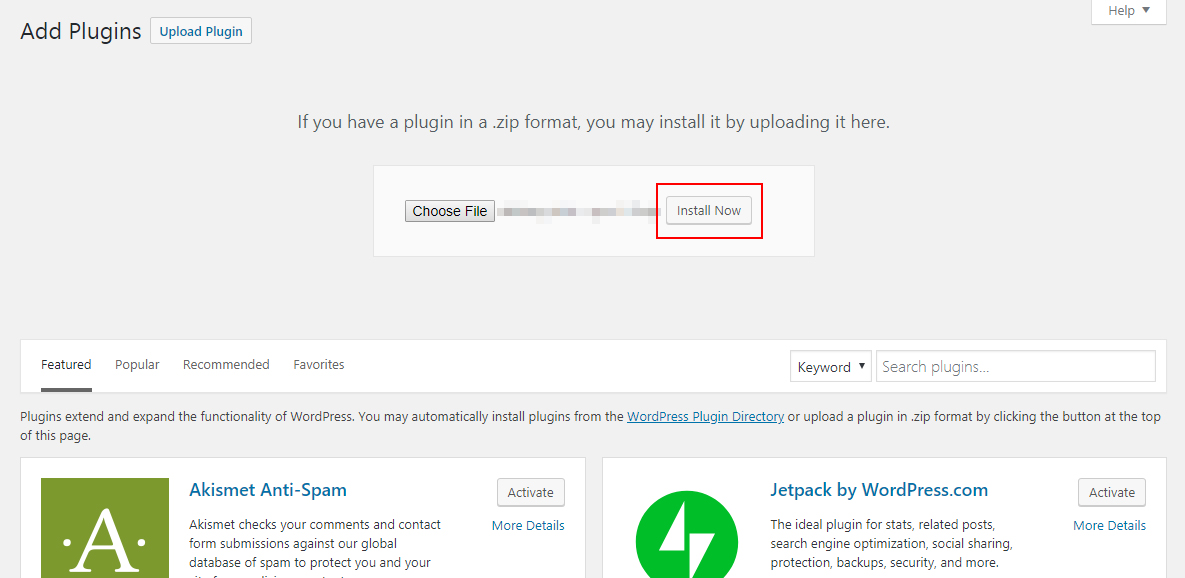
Once you have the file downloaded to your device (laptop, PC, etc), you can head over to the Add Plugins page of your website admin dashboard to upload the DFWC Pro plugin.
Find this page by going to Plugins -> Add New, and then click the Upload Plugin button.

Now you can choose the DDWC Pro .zip file you just downloaded from your order and click the Install Now button.
Once you’ve done this, you’ll see a screen that asks you if you’d like to Activate the plugin.
Click the Activate Now button and you’ll have successfully installed the Delivery Drivers for WooCommerce Pro plugin!
Pro settings for the Delivery Fees “Shipping Method”
Heading back to the WooCommerce Shipping Zones page, you’ll now be able to choose your zone, and update the Shipping Method with the DDWC Pro settings.
The Pro plugin adds in the fee type option, and an order minimum required before customer is allowed to checkout.
The current available options for the Fee type include:
- Flat rate
- Percentage
- Distance (per mile)
- Distance (per minute)
- Distance + Time
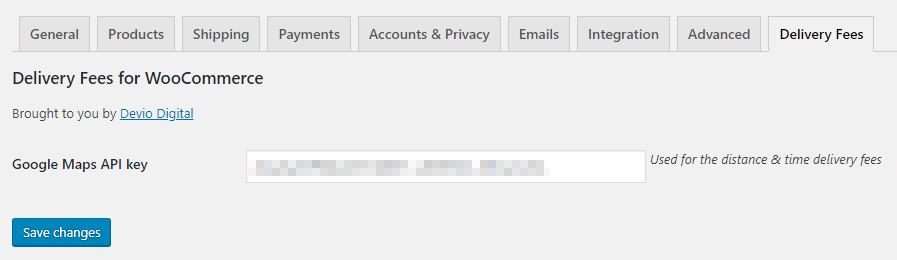
When you are using any of the ‘distance’ fee types, you’ll need to add your Google Maps API key to the Delivery Fees settings page.
You can find the API Key setting by going to WooCommerce -> Settings -> Delivery Fees.
You can create a Google Maps API Key here (link).
Code Customizations
Developers can take advantage of our action hooks and filters included in the plugins we release.
Delivery Fees for WooCommerce (both the free and pro versions) have their own sets of filters you can check out at the links below.
Do you see anything missing?
Are there features you’d like to see in this plugin set that aren’t already included?
If so, let me know via the contact page. I’m always looking for ways to make the plugins better, and appreciate your input!